DIY WiFi Security Camera Setup Guide for Beginners
Knowing your home is safe brings a special peace. You should feel secure without worrying about complicated setups or high costs. Today, technology lets you protect your home easily.
This diy wifi security camera guide is here to help you secure your home. You can do it all in under 30 minutes with tools you probably have. By following this diy surveillance camera tutorial, you’ll learn to handle your equipment with confidence.
Choosing a do it yourself security camera system is wise for homeowners. It saves money and teaches you skills to keep your family safe. Let’s start building your home defense system today.
Key Takeaways
- Complete your home protection setup in less than 30 minutes.
- Avoid high costs by managing the installation process yourself.
- Use standard household tools to mount and sync your devices.
- Gain peace of mind with real-time monitoring of your property.
- Follow simple steps to ensure your system is secure and reliable.
Planning Your Home Surveillance Strategy
Starting a diy wifi security camera project needs careful planning before you start. Mapping out your property helps you cover all important angles without buying too much. Good planning leads to a reliable do it yourself security camera system that keeps your home safe.
Assessing Your Property Security Needs
Begin by walking around your home to spot high-risk areas. Look at main entry points like front doors, back entrances, and windows on the ground floor. Also, watch your driveway or side gates where intruders might try to get in.
Making a list of these areas helps you figure out how many cameras you need. This step is key to a good diy surveillance camera tutorial. By focusing on these spots, you make sure your money goes to the most important parts of your property.
Choosing Between Indoor and Outdoor Camera Placements
After finding your zones, pick the right cameras for each spot. Outdoor cameras need to handle weather and sunlight. For clear views, install them at 8 to 10 feet high for better facial recognition.
Indoor cameras are smaller and go in busy places like living rooms or hallways. Don’t put them behind glass to avoid glare and night vision issues. Here’s a quick guide for where to place them:
| Location Type | Recommended Height | Primary Goal |
|---|---|---|
| Front Porch | 8–10 Feet | Visitor Identification |
| Driveway | 9–10 Feet | Vehicle Monitoring |
| Living Room | 7–8 Feet | General Activity |
Evaluating WiFi Signal Strength and Coverage
Your diy wifi security camera needs a strong internet connection to stream video. Before setting up, check the signal at each spot with your phone. A weak signal can cause video lag or drops.
Use a WiFi analyzer app to find dead spots in your home. If you have weak areas, you might need a range extender or a mesh network. A strong connection is crucial for a good do it yourself security camera system, so you always get alerts.
Selecting the Right Hardware for Your Needs
Your success with a diy wifi security camera starts with the right hardware. You need to match your power needs with the environment where you’ll mount it. Quality components ensure your system works well for a long time.
Understanding Camera Resolution and Field of View
Resolution affects how clear your video is. For homes, 1080p is common, but 2K or 4K gives more detail. Choose higher resolution for clear views of faces or license plates from far away.
The field of view (FOV) shows how much area a lens can capture. A wider FOV means fewer cameras are needed. But, very wide lenses can distort at the edges.
Comparing Night Vision and Motion Detection Capabilities
Good security means seeing in the dark. Most use infrared (IR) sensors for clear black-and-white footage at night. Some cameras even offer color night vision for better identification.
Motion detection is key for any do it yourself security camera. Look for PIR sensors to avoid false alerts from trees or animals. This keeps your alerts relevant and timely.
“The best security system is one that you can trust to alert you only when it truly matters, regardless of the time of day.”
Power Options: Battery-Powered vs. Wired Cameras
Choosing between battery-powered and wired cameras is crucial. Battery-powered cameras are flexible and easy to install. They’re great for renters or places where wiring is hard.
Wired cameras offer constant power, so you don’t need to recharge. They’re best for busy areas where cameras are always recording. Use the table below to decide.
| Feature | Battery-Powered | Wired (Plug-in) |
|---|---|---|
| Installation Ease | High | Moderate |
| Power Source | Rechargeable Battery | AC Outlet |
| Maintenance | Periodic Charging | None |
| Best Use Case | Temporary/Remote | Permanent/High Traffic |
Preparing Your Network for Security Devices
A strong network is key for a smooth wireless security camera installation. Your router is the main hub for all data. Make sure it’s set up right to avoid lag or disconnections. If your signal is weak in some spots, a WiFi extender can help.
Optimizing Your Router Settings for Multiple Devices
Most routers handle many connections well. But, security cameras need steady bandwidth. Log into your router to make your cameras a priority. Quality of Service (QoS) settings help keep your feed smooth, even when others are online.
Also, check your router’s channel settings to avoid neighbor interference. A less crowded channel can improve your connection. These tips can greatly enhance your experience.
Creating a Dedicated Guest Network for IoT Devices
Security experts suggest isolating smart home devices. A dedicated guest network for your cameras adds protection. It also helps manage bandwidth better, as IoT devices use different patterns than personal devices.
Ensuring Sufficient Upload Speeds for Cloud Streaming
Many focus on download speeds, but upload is key for cameras. Slow upload speeds can cause choppy footage or delayed alerts. Run a speed test to ensure your provider meets your camera’s needs.
| Network Factor | Recommended Action | Benefit |
|---|---|---|
| Signal Strength | Install WiFi Extender | Eliminates dead zones |
| Traffic Priority | Enable QoS Settings | Reduces video lag |
| Network Security | Use Guest Network | Protects personal data |
| Upload Speed | Verify with ISP | Ensures clear streaming |
By following these wifi security camera tips, you’ll keep your system reliable. A stable network is crucial for home safety, giving you peace of mind and consistent performance.
Essential Tools for DIY WiFi Security Camera Installation
Getting ready is key to a smooth wireless security camera installation. The right tools make your project faster and look better. Organize your space first to avoid extra trips to the store.
Gathering Necessary Hardware and Mounting Gear
Start by gathering the basics. You’ll need a power drill, drill bits, a screwdriver, and the mounting gear from your camera kit.
Use a stud finder to find safe spots to drill. This step is crucial to avoid hitting electrical or plumbing lines. It’s a top wifi security camera tip for beginners.
Safety Equipment for Ladder Work and Drilling
Always prioritize safety when working high up. A strong, stable ladder is key for exterior or ceiling mounts.
Wear proper eye protection when drilling to avoid injuries from debris. Make sure your ladder is on level ground and consider having someone hold it for stability.
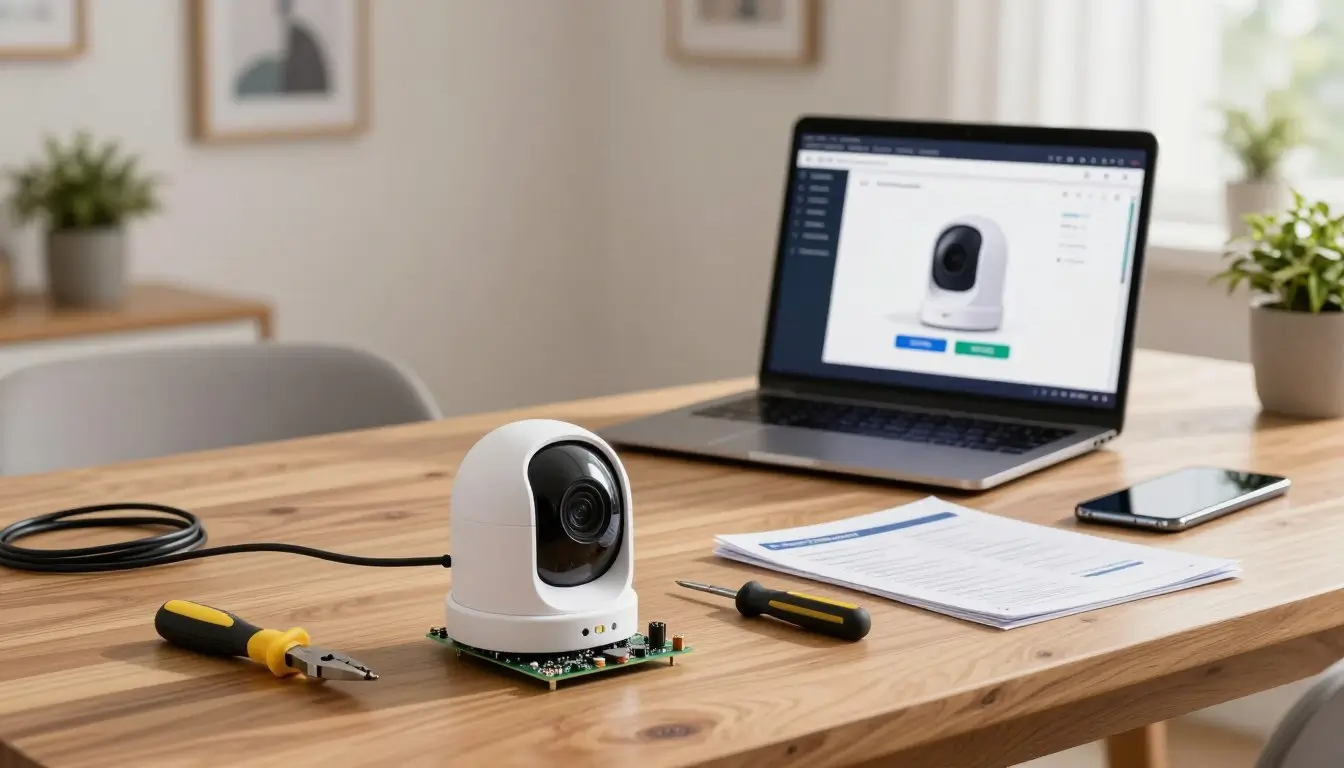
Testing Your Camera Before Permanent Mounting
Don’t skip the test phase before fixing your camera in place. Turn it on near your router to check network connection and video quality.
This step lets you confirm the camera works right without the trouble of uninstalling it. Following these wifi security camera tips ensures your wireless security camera installation is both effective and reliable.
| Tool Category | Essential Item | Purpose |
|---|---|---|
| Measurement | Tape Measure | Ensuring precise camera placement |
| Detection | Stud Finder | Locating safe drilling surfaces |
| Installation | Power Drill | Securing mounts to walls |
| Safety | Safety Glasses | Protecting eyes from debris |
Configuring Your Security Camera Software
Setting up your camera software is a key step before you start climbing ladders. Doing this on the ground helps you fix any connection problems without the trouble of being on a roof. It’s a crucial part of your wireless security camera installation journey.
Downloading and Setting Up the Manufacturer App
Most systems use a special app to manage your devices. Download the official app from your phone’s app store to make sure it works right.
After you install it, the app will help you pair your camera. Many cameras use QR code scanning to connect to your network easily, making setup quick and simple.
Creating Secure Accounts and Enabling Two-Factor Authentication
Your privacy is key, so choose a strong password. Pick something unique and complex that you don’t use anywhere else.
“Security is not a product, but a process.”
Also, turn on two-factor authentication (2FA) in the app settings. This adds an extra layer of security. It makes sure only you can see your video feeds, even if someone guesses your password.
Updating Firmware to the Latest Version
Keeping your device software up to date is crucial. Manufacturers often release updates with important security fixes and performance boosts.
In your app settings, check if there’s an update available. Installing these updates right away helps keep your home safe. It also makes sure your system works smoothly and reliably.
Mounting Your Cameras for Optimal Coverage
Now that your digital setup is complete, it’s time to mount your devices. The home surveillance system needs physical placement for full coverage. Proper mounting keeps your equipment stable and offers the best view.

Installing Indoor Cameras on Walls or Shelves
For indoor cameras, corner placement is key. A corner camera can watch over large areas or entryways. It’s a smart way to cover more space with one camera.
Mount them on walls or high shelves using the given brackets. Make sure the surface is level to avoid distorted views. Also, check that the power cable doesn’t pose a tripping risk.
Securing Outdoor Cameras to Siding or Brick
Outdoor cameras need to be durable and weather-resistant. When mounting on siding or brick, use the right anchors for stability and security. This prevents the camera from moving in the wind or being tampered with.
Drill into brick with a masonry bit to avoid damage. After fixing the bracket, tighten all screws well. A solid installation is crucial for your home’s security.
Adjusting Angles to Minimize Blind Spots
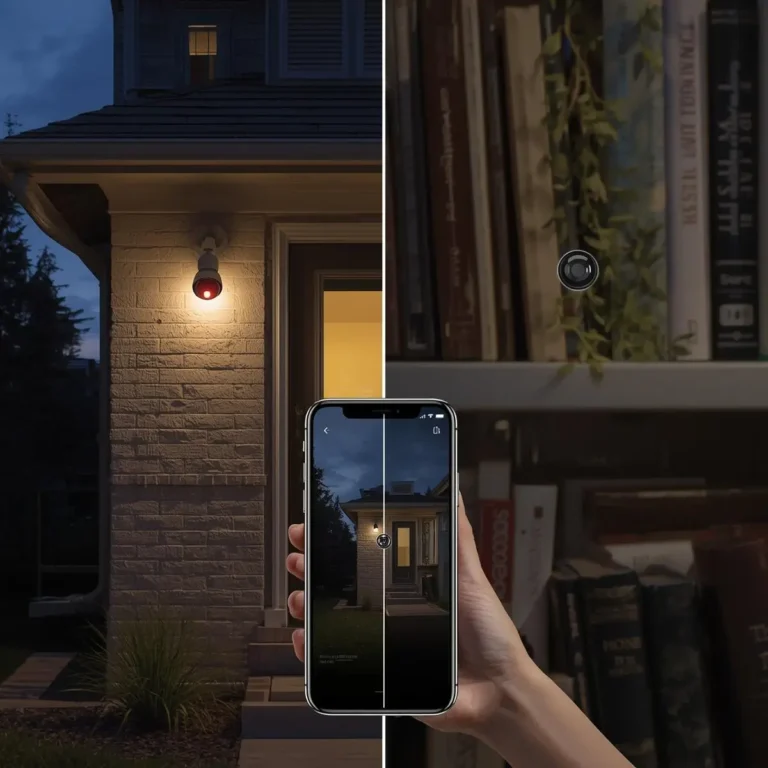
After mounting, adjust the camera angles. Test the live feed on your phone while someone moves through the area. This helps spot any hidden blind spots.
Adjust the camera’s tilt and rotation until all important areas are in view. Fine-tuning these angles ensures no movement is missed. Proper alignment is key to a complete security system.
Connecting and Syncing Your Devices
The last step is to connect your devices for a seamless network. After setting up your cameras, you need to link them to your digital setup. This makes your home surveillance system work together as one unit.
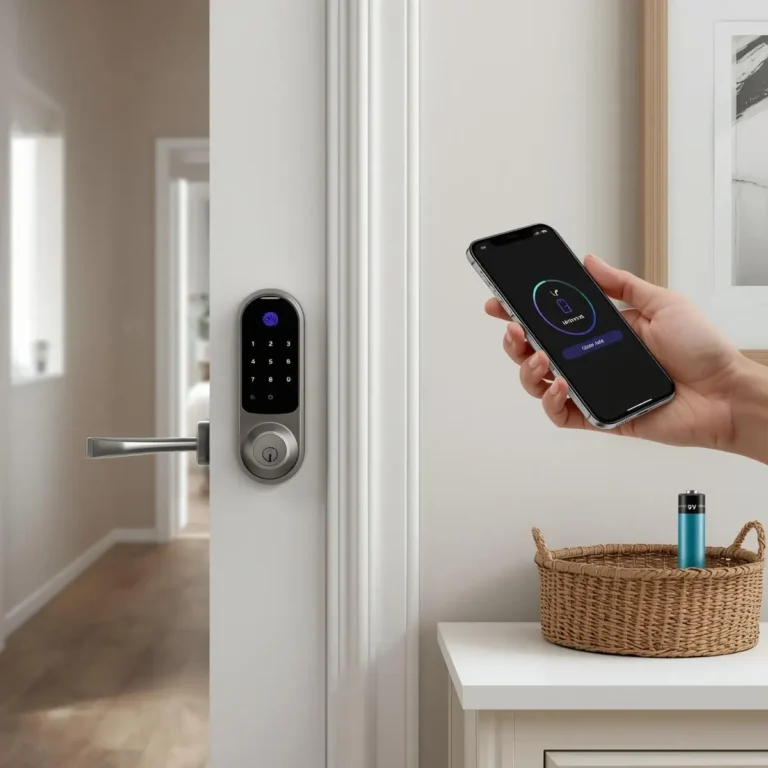
Pairing Cameras with Your WiFi Network
Start by turning on your camera and opening the app on your phone. Follow the app’s instructions to start the security camera software installation. You’ll need to pick your 2.4GHz WiFi network and enter your password.
Make sure your phone is on the same network as your camera. This lets the app find and connect your camera to your account. When the camera’s light turns solid, it’s connected.
Syncing Multiple Cameras to a Single Hub or App
If you have a central hub, like the Blink Sync Module 2, pair it first. These hubs connect all your cameras to one spot. They work well within a 100-foot radius.
After the hub is set up, add each camera through the app. This central setup makes managing your security camera software installation easier. It also saves battery by doing some work for the cameras.
Verifying Live Feed Connectivity
Now, test your system by checking the live feed in your app. A clear, smooth feed means your home surveillance system is working well.
If you see delays or blurry images, try adjusting the camera or moving the hub. Checking this now avoids problems later when you need to watch your cameras live. Consistent access to your footage is key for a good DIY setup.
Customizing Motion Detection and Alert Settings
After setting up your home surveillance system, it’s time to fine-tune its motion detection. If not adjusted right, you might get too many alerts. These can be distracting and not really important.
It’s important to tweak these settings to make your system work better. This is a key part of setting up your security camera software.
Defining Activity Zones to Reduce False Alarms
Activity zones let you tell your camera to ignore certain areas. This means you won’t get alerts from busy sidewalks or swaying trees.
Also, make sure your motion sensors aren’t pointing at reflective surfaces. Things like windows and mirrors can cause your sensors to go off when light changes.
Adjusting Sensitivity Levels for Pets and Weather
Most cameras let you adjust how sensitive they are. This helps tell the difference between a person and a pet. If you have pets, lower the sensitivity to avoid recording them all the time.
Weather like rain or leaves can also set off your sensors. Try different sensitivity levels at different times to find what works best for you.
Setting Up Push Notifications and Email Alerts
After you’ve set up your detection zones and sensitivity, it’s time to choose how you get updates. Enable push notifications on your phone to get immediately informed of any activity.
For extra security, many people also set up email alerts. This gives you a backup of all events, which is useful for reviewing footage later.
Managing Your Video Storage and Privacy
Effective data management keeps your recorded events private and easy to review. Whether setting up your outdoor wifi camera or doing wifi camera troubleshooting, managing video files is key.
Choosing Between Cloud Storage and Local SD Card Recording
Most systems let you save footage in two ways. Cloud storage sends clips to a secure server. Local SD card recording keeps data on the device itself.
| Feature | Cloud Storage | Local SD Card |
|---|---|---|
| Accessibility | Available anywhere | Requires physical access |
| Cost | Monthly subscription | One-time purchase |
| Security | Encrypted remote servers | Physical device control |
Understanding Data Encryption and Privacy Best Practices
Privacy is a basic right that needs your constant care. Always make sure your camera only shows your property. This respects your neighbors’ privacy.
“Privacy is not an option, and it should not be the price we pay for security.”
To protect your data, turn on end-to-end encryption in your app settings. This stops others from seeing your feeds or clips, even if they intercept your network.
Regularly Backing Up Important Footage
Hardware failure or theft can lose critical evidence. Download important clips to a safe place, like a computer or external hard drive.
Having backups ensures your records are safe, even if devices fail. Consistency in backups gives you peace of mind and keeps your system reliable for years.
Troubleshooting Common WiFi Camera Issues
When your security hardware stops working right, a step-by-step approach is key. Even top systems can have tech issues, but most can be fixed with a little effort. Testing your devices well before setting up your outdoor wifi camera can save you from climbing up and down ladders.
Resolving Connection Drops and Signal Interference
If your video feed keeps cutting out, your network signal might be weak. Things like thick walls or metal siding can block the signal, causing problems. Always check your connection strength at the camera’s spot before you fix it in place.
Improving stability can be as simple as moving your router closer to the camera or using a WiFi range extender. Also, try to reduce interference from other electronics to keep your stream steady. Good wifi camera troubleshooting means having a strong and clear network environment.
Fixing Offline Camera Status Errors
An “offline” status in your app can be annoying, but it’s usually a simple issue. First, make sure your power cable is plugged in well and the outlet works. If the power is okay, check that your router is sending out a signal and your internet is on.
At times, a simple power cycle can fix the problem. Unplug the camera for thirty seconds and plug it back in. This often fixes temporary software issues without needing more help.
Resetting Devices to Factory Settings When Necessary
If you’ve tried everything else, a factory reset might be needed to fix things. This resets the device to its original state. Use this as a last resort, as you’ll have to set everything up again.
To reset, find the reset button, often hidden behind a small rubber flap or near the SD card slot. Press the button for the time shown in your manual until the status light blinks. After the reset, start the setup process again to get your system working.
Conclusion
Protecting your property gives you lasting peace of mind. A good outdoor wifi camera setup keeps intruders away. It also lets you stay connected to your home from anywhere.
You now know how to manage your surveillance network well. Regular checks keep your equipment working for years. If you run into small problems, just look at your wifi camera troubleshooting notes to fix it fast.
Stay ahead by checking your device settings and updates often. Joining your local neighborhood watch or sharing safety tips with friends can help everyone. Your dedication to home security makes a big difference in your life. Enjoy the peace of mind that comes with a safe home.
FAQ
At what height should I mount my diy wifi security camera to get the best view?
For a top-notch home surveillance system, install your devices at 8 to 10 feet high. This height is perfect for facial recognition. It also prevents blind spots and keeps the hardware safe from tampering.
What are the most important wifi security camera tips for planning my placement?
When setting up your outdoor wifi camera, check high-risk spots like front doors and driveways. Make sure your cameras are not in direct sunlight or near reflective surfaces. This avoids glare and false motion alerts.
Can I manage a wireless security camera installation without professional help?
Yes, you can. Most systems are easy to install yourself and take less than 30 minutes. Use tools like a stud finder and drill to secure your property without professional costs.
Why should I perform the security camera software installation before mounting the hardware?
Setting up your software at ground level makes pairing easier with QR code scanning. This step ensures a smooth connection and allows for two-factor authentication. It’s safer and easier to do before climbing a ladder.
How can I ensure my network is strong enough for my home surveillance system?
A stable connection is crucial for your security. If your router is far, use a WiFi extender or a dedicated guest network for IoT devices. This manages bandwidth and ensures high-quality streaming and alerts.
How far can I place my cameras from the central hub, such as a Blink Sync Module 2?
You can usually keep cameras within 100 feet of a hub like the Blink Sync Module 2 in open areas. Always check your feed through the app before mounting it permanently.
What is the best way to handle wifi camera troubleshooting if a device goes offline?
First, check your network settings and power source, especially for battery-powered models. If signal issues persist, try moving the camera closer to the router or reset it as a last resort.
Does this diy surveillance camera tutorial cover how to reduce false motion alerts?
Yes. Use the app to define activity zones and adjust sensitivity levels. This way, you can ignore swaying trees, traffic, or pets, focusing on real security concerns.
How should I manage video storage and privacy for my do it yourself security camera?
Choose between cloud storage and local SD card recording based on your needs. Position your cameras to only record your property. Use data encryption and update firmware regularly to protect your footage.