DIY Bluetooth Controlled Devices for Easy Home Projects
Ever thought about how much easier life could be if your home responded to your touch? Building your own tech brings a unique sense of pride. You can make your space more convenient with simple, affordable parts.
Starting with electronic diy projects lets you tailor your home just right. It doesn’t matter if you’re new or experienced. These projects make home automation easy for everyone. You’ll learn to set up wireless systems from the start.
We’ll show you how to turn your ideas into real-life solutions. You’ll see how diy bluetooth controlled devices can make your daily life easier. Let’s start making your home smarter together.
Key Takeaways
- Learn to connect physical hardware with digital interfaces easily.
- Discover how to use affordable components for home automation.
- Gain confidence in building custom wireless systems from scratch.
- Explore practical applications suitable for all skill levels.
- Master the fundamentals of modern home connectivity projects.
Understanding the Fundamentals of DIY Bluetooth Controlled Devices
To make diy bluetooth controlled devices, you need to know how they talk wirelessly. Bluetooth is like a translator. It changes data from your microcontroller into signals your phone can understand. With good iot devices tutorials, you can turn simple parts into smart devices.

How Bluetooth Low Energy Works in Home Automation
Bluetooth uses the 2.4 GHz band to send data over short distances. This band is worldwide, so your devices can talk without getting in the way. Bluetooth Low Energy (BLE) is great for home use because it uses little power but stays connected well.
When you send a command from your phone, the Bluetooth module turns it back into serial data. Your microcontroller then acts on this data. For example, it might turn on a light or lock a door. This smooth process makes wireless control easy and effective for DIY fans.
Essential Hardware Components for Your Projects
For a solid system, you need a few key parts. You don’t have to spend a lot to start, but picking the right stuff keeps your project working well.
- Bluetooth Module: The HC-05 or HC-06 are good for serial talk.
- Microcontroller: An Arduino or ESP32 is your device’s brain.
- Power Supply: A steady 5V or 3.3V keeps your connection strong.
- Jumper Wires: Good connections are key for sending data right.
Each part has its job in your circuit. Knowing how they work together helps you fix problems and grow your project.
Selecting the Right Microcontroller for Your Wireless Needs
Starting with wireless automation, the microcontroller is key. It’s the brain of your system. Picking the right one is crucial for your beginner electronics projects. Knowing the strengths of different boards helps avoid mistakes and ensures devices talk well.

Why Arduino Uno is Ideal for Beginners
The Arduino Uno is great for newbies. It’s easy to use and has lots of community support. This makes it perfect for learning coding and circuit design. You’ll often use it with a Bluetooth module for wireless.
For beginner electronics projects, HC-05 and HC-06 modules are common. The HC-05 is versatile, working as both master and slave. But, the HC-06 only works as a slave, which limits its use in complex setups.
Leveraging ESP32 for Built-in Bluetooth Capabilities
The ESP32 is a great choice for simpler setups. It has built-in Bluetooth and Wi-Fi, so you don’t need extra modules. This makes your project cleaner and more efficient for advanced tasks.
Here’s a comparison to help you choose:
| Feature | Arduino Uno | ESP32 |
|---|---|---|
| Bluetooth | Requires External Module | Built-in |
| Complexity | Very Low | Moderate |
| Connectivity | HC-05/HC-06 | Native Wireless |
Choosing depends on your goals. The Arduino Uno is easy for beginners. But, if you’re ready for more, the ESP32 offers the power and connectivity you need.
Setting Up Your Development Environment
A good development environment is key for any project. It connects your computer to your hardware smoothly. This is crucial for starting beginner electronics projects with confidence.
Installing the Arduino IDE on Your Computer
The Arduino IDE is your main tool for coding. It works well on Windows and Mac. You can get the latest version from the official website.
After downloading, just follow the installation steps. Proper installation is important. It lets your computer see your microcontroller when you plug it in. After installing, open the app to make sure it works.
Configuring Libraries for Bluetooth Communication
After setting up the software, you need to get it ready for Bluetooth. Go to “Tools” and pick your board model. Then, choose the right port. This is key for arduino bluetooth projects.
Then, manage your libraries for wireless use. Use the Library Manager to find and add Bluetooth packages. Configuring these libraries correctly lets your code work with modules like HC-05. With these settings, you’re ready for your first wireless project.
Establishing Serial Communication Between Devices
Getting your HC-05 module to talk is key for wireless control projects. It connects your smartphone to your hardware, making it respond fast. A good connection keeps your arduino bluetooth projects working well.
Wiring the HC-05 Bluetooth Module to Your Microcontroller
First, you need to wire it right. Connect the VCC pin to 5V and the GND pin to ground. The data pins are the most critical part.
Link the TX pin of the HC-05 to your microcontroller’s RX pin. Then, connect the RX pin of the module to your board’s TX pin. This setup lets devices send and receive data smoothly. Always check these connections before turning on your circuit to avoid damage.
Testing Connection Stability with Serial Monitor
After wiring, check if the module is working. Open your development environment and start the Serial Monitor. Make sure your baud rate is set right.
HC-05 modules usually run at 9600 baud in standard mode. For command mode, they switch to 38400 baud. If you see messy text or no response, check your baud rate.
Testing early helps spot signal issues or wiring mistakes. By making sure your arduino bluetooth projects send and receive data well, you’re ready for more complex wireless control projects.
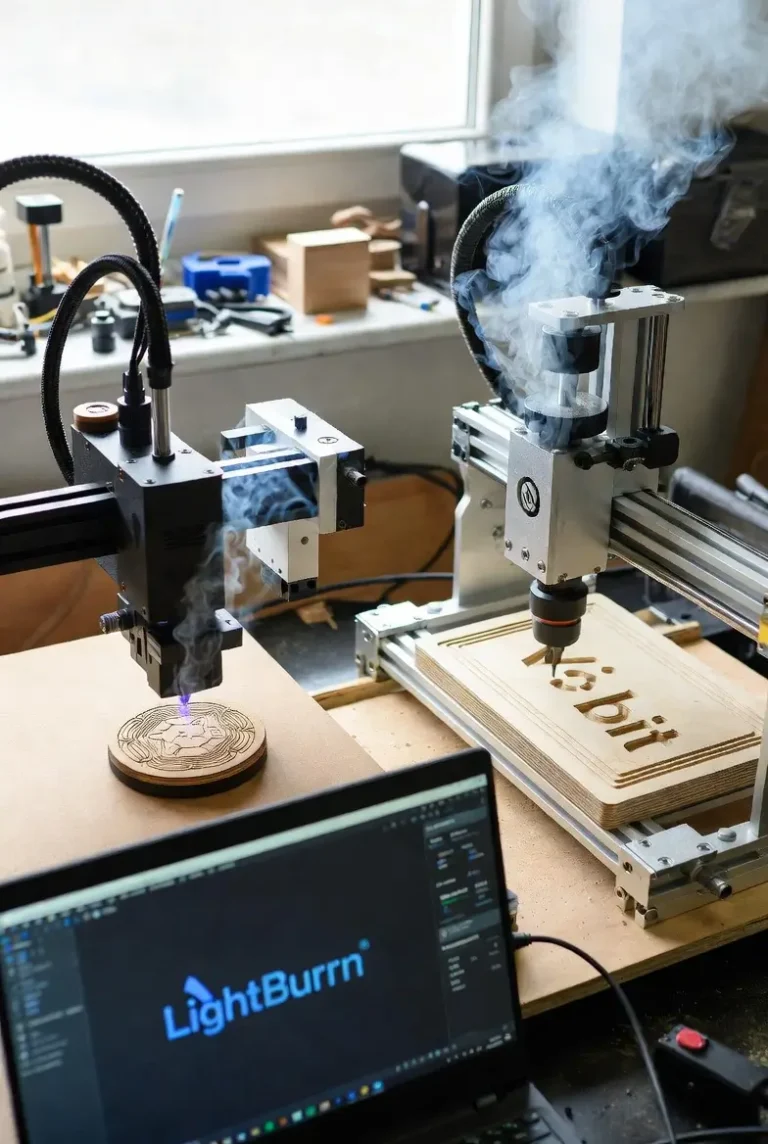
Building a Smartphone-Controlled LED Lighting System
Creating a smartphone-controlled LED system is a great project for electronics fans. It brings mobile connectivity to your lighting, making it a top-notch diy smart home device. You can change the brightness from afar, adding both ease and style to your space.
Designing the Circuit for Remote Light Dimming
To get smooth dimming, use Pulse Width Modulation (PWM) on your microcontroller. Standard pins can’t handle the power of high-intensity LEDs. So, add a MOSFET to manage the current safely. This keeps your wireless control projects stable and quick to respond.
- Connect the LED positive terminal to a power source.
- Wire the negative terminal to the drain pin of your MOSFET.
- Link the gate pin to a PWM-enabled pin on your microcontroller.
- Ensure a common ground is established between all components.
Writing the Code for Mobile App Integration
Your code must listen for data packets from the Bluetooth module. When it gets a signal, it changes the PWM duty cycle based on the character received. This lets your hardware turn text commands into exact light changes.
Use a strong loop to always check for new input. Map characters to brightness levels for detailed control. This is key for making diy smart home devices that work fast on your commands.
Configuring the Serial Bluetooth Terminal App
Android users should use the Serial Bluetooth Terminal app for testing. Pair your phone with the Bluetooth module, then open the app. Pick your device and set the terminal settings to match your microcontroller’s baud rate, usually 9600.
Send test characters to see if your circuit works right. This is crucial for fixing any wireless control projects before making your mobile app. The terminal app helps you find and fix data issues, ensuring a smooth user experience.
Creating a Wireless Home Security Alarm
Building your own home security system is easier than you think. With modern tech, you can set up a system that alerts you to any movement. This bluetooth gadget making project keeps you safe and teaches you about sensor tech.
Integrating Motion Sensors with Bluetooth Alerts
To begin, you’ll need a PIR motion sensor and an HC-05 module. These are common in remote control diy kits and work well for security. Connect the sensor to your microcontroller to catch changes in infrared.
The HC-05 module has a 10-meter range in open spaces. But, things like walls and metal can cut this range down. Make sure to place your sensors right to avoid signal loss.
Developing Logic for Real-Time Notifications
Your system’s heart is in its code. When the PIR sensor spots motion, your microcontroller sends a signal to your phone. This signal makes your phone alert you.
Here’s what you need for your alerts:
- Initialize the serial connection at the right baud rate for your module.
- Define a threshold for the motion sensor to avoid false alerts from pets or drafts.
- Implement a debounce timer to stop getting alerts for the same event.
Learning these steps boosts your bluetooth gadget making skills. Using top-notch remote control diy kits makes your system reliable. With testing, you’ll have a strong, wireless alarm that updates you on your home’s status in real time.
Developing a Bluetooth-Enabled Smart Fan Controller
Turning a regular fan into a smart one is a great step in your DIY journey. With wireless tech, you can control your fan from your phone. This makes your home tech-savvy with little effort.
Interfacing Relays with Your Microcontroller
To control a fan, you need to connect low-voltage logic to high-voltage power. A relay module is like an electromechanical switch. It lets your microcontroller safely turn the fan on and off.
When your microcontroller sends a signal, the relay coil turns on. This closes the circuit and powers the fan. Proper wiring is critical to avoid short circuits and keep your system working well.
“The beauty of home automation lies in the ability to repurpose existing infrastructure into intelligent systems that respond to your specific needs.”
Managing Power Loads for Home Appliances
Creating diy smart home devices means you must respect electrical safety. Fans use a lot of current, so choose a relay that can handle it. Make sure your relay can manage the motor’s inductive load to avoid damage.
Here’s what to look for in a relay for your project:
| Component Feature | Standard Requirement | Safety Priority |
|---|---|---|
| Relay Voltage | 120V/240V AC | High Insulation |
| Current Rating | 10A – 15A | Overload Protection |
| Trigger Logic | 3.3V or 5V DC | Opto-isolation |
| Switching Type | Mechanical/Solid State | Arc Suppression |
Learning these skills ensures your diy smart home devices work well and safely. Properly calculating power loads protects your devices. This knowledge is key for anyone looking to improve their bluetooth gadget making skills.
Designing Custom Mobile Interfaces for Your Gadgets
Creating a unique user interface lets you control your projects from your smartphone. You can make a dashboard that fits your specific needs. This customization makes your projects stand out from the rest.
Using MIT App Inventor for Drag-and-Drop Design
MIT App Inventor offers a visual environment that’s easy to use. You can drag and drop elements onto a virtual screen. This makes designing your interface simple and fun.
This platform takes care of the technical stuff. You can focus on making your layout look good. Add images, change colors, and organize your design to make it user-friendly.
Mapping UI Buttons to Bluetooth Commands
After designing your layout, you need to connect it to your Bluetooth module. Use the block-based editor to link your buttons to actions. For example, tapping “Light On” sends a character like ‘A’ through Bluetooth.
Your microcontroller code must recognize these characters to perform actions. Consistency is key for accurate responses. This ensures your remote control diy kits work well and are easy to use.
Troubleshooting Common Connectivity Issues
Learning to fix wireless setup problems is key for makers using remote control diy kits. Even top-notch hardware can have issues at first. Knowing how to find and fix these problems keeps your projects working well.
Resolving Pairing Failures and Signal Interference
Pairing problems are common at first. They often come from small mistakes in setup. Always check that your wiring matches your plan exactly before thinking something’s wrong.
Things that can cause connection drops include:
- Baud rate mismatches: Make sure your code and Bluetooth module are at the same speed, usually 9600 bps.
- Power supply instability: Bluetooth needs a steady voltage. Fluctuations can make it reset or disconnect.
- Physical interference: Big metal things or other 2.4GHz devices can mess with your signal. Keep your modules clear of these.
Debugging Code Errors in Wireless Data Transmission
If your hardware is set up right but data isn’t flowing, it’s probably a software issue. Debugging is crucial for making sure your remote control diy kits work well. This means your smartphone and microcontroller talk smoothly.
Use the Serial Monitor to watch data packets. If you see messy text or nothing, check your settings. Consistency is key when linking app buttons to code functions.
If commands are ignored, add print statements to your code. This checks if the microcontroller gets the signal. It helps figure out if the problem is sending, receiving, or executing the command.
Expanding Your Projects with IoT Integration
Going beyond Bluetooth opens up new possibilities for your home automation. Bluetooth is great for close-range tasks, but the internet lets you control things from afar. This step is key for turning your custom gadgets into a full-fledged network.
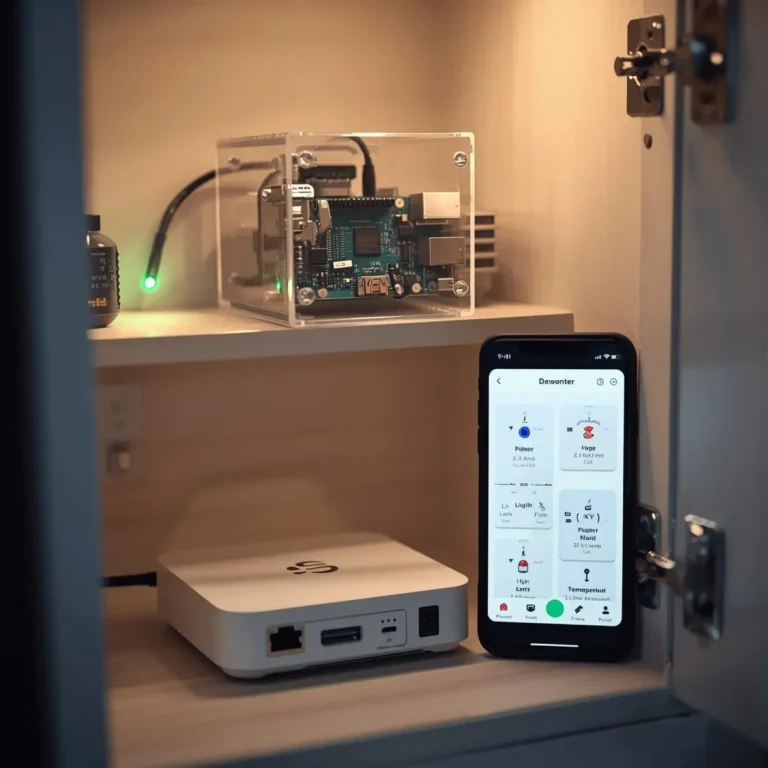
Bridging Bluetooth Devices to Local Wi-Fi Networks
Use a gateway like an ESP32 or Raspberry Pi to connect your devices. These gadgets translate Bluetooth signals into Wi-Fi, letting you control your home from anywhere. With the right iot devices tutorials, you can link these bridges to the cloud or local hubs.
This setup makes your devices work even when you’re not nearby. It extends your system’s range, so you can control things from any room. Reliability jumps up with a network setup over point-to-point connections.
Scaling Your DIY Smart Home Ecosystem
To grow your diy smart home devices, adopt modular design and standard protocols. As you add more devices, managing them from one place gets easier. Use platforms like Home Assistant or MQTT to keep your data in order.
This method lets you set up complex rules that cover different areas. Centralizing control reduces signal problems and boosts your smart home’s performance. Here’s a comparison of Bluetooth setups and IoT systems.
| Feature | Bluetooth Only | IoT Integrated |
|---|---|---|
| Range | Limited (30 feet) | Unlimited (via Wi-Fi) |
| Control | Local Smartphone | Remote/Cloud Access |
| Scalability | Low | High |
| Complexity | Simple | Advanced |
Safety Protocols for Working with Electronic DIY Projects
Working on electronic diy projects means managing power right. This keeps your hardware working and your space safe. Knowing electrical limits helps avoid mistakes and accidents.
“Safety is not just a feature; it is the fundamental requirement of every successful engineering endeavor.”
Managing Voltage and Current Safely
One big mistake is using the wrong voltage for parts. For example, the HC-05 Bluetooth module needs 3.3V, but many chips send 5V. You must use a voltage divider to lower the voltage, or you’ll damage the module.
Always check the power needs of each sensor and relay before connecting them. Use a multimeter to check voltages before turning on your circuit. This is a best practice that saves time and money. Never assume two parts will work together without checking their data sheets.
Best Practices for Enclosure and Wiring Management
Good wiring management is key for your electronic diy projects to last. Loose wires can cause short circuits, leading to fires or unexpected behavior. Use heat-shrink tubing to cover all connections and keep wires tidy with zip ties or clips.
Choosing the right enclosure is also crucial. It protects your electronics from dust, moisture, and accidental damage. Make sure your housing has good ventilation, especially if you’re using heat-generating parts. A well-made enclosure makes your project durable and safe for long-term use.
Always double-check your connections before turning on your system. These simple steps let you enjoy your electronic diy projects without worry.
Conclusion
Building diy bluetooth controlled devices opens a world of creative potential for your living space. You now have the basic knowledge to turn simple projects into advanced systems. Your journey into automation starts with these skills.
Practical application is the best way to master these iot devices tutorials. Start by improving your beginner electronics projects for better efficiency and reliability. Every small change brings you closer to professional-grade projects.
The field of bluetooth gadget making is always changing with new updates. Keep exploring advanced arduino bluetooth projects to grow your skills. Using these tools in your daily life makes your home a hub of innovation.
Creating diy smart home devices takes patience and a willingness to improve your designs. You might want to add custom sensors or cloud connectivity to your remote control diy kits. Share your progress with the maker community to inspire others and get new ideas.
Your dedication to learning keeps your custom gadgets working well and secure. Keep trying new things to see how far your imagination can go. The path to becoming an expert in home automation is wide open for you to explore.
FAQ
Which microcontroller should I choose for my first beginner electronics projects?
For beginners, the Arduino Uno is a top choice. It’s easy to use and has lots of community support. The ESP32 is also great for its small size and built-in Wi-Fi and Bluetooth, making it perfect for arduino bluetooth projects.
What is the main difference between the HC-05 and HC-06 Bluetooth modules?
The HC-05 is versatile, working in both “master” and “slave” modes. This means it can start a connection or wait for one. The HC-06 only works in “slave” mode. The HC-05 is better for most projects because of its flexibility.
How do I create a custom mobile app for my remote control diy kits?
Use MIT App Inventor to make professional apps for your diy kits. It’s easy to use and lets you design interfaces without coding. Just connect your app to your devices and they’ll do what you want.
Can I use diy bluetooth controlled devices to manage high-power home appliances?
Yes, you can control big appliances like fans or lamps. Just add a relay module to your circuit. This lets your low-voltage signal turn on high-voltage power. It’s a key skill for making smart home devices.
What should I do if my smartphone cannot find my Bluetooth module?
Troubleshooting is part of the fun. Make sure your module has power and its LED is blinking fast. Check your wiring, especially the TX and RX pins. Also, make sure your baud rate in the Arduino IDE matches the module’s default.
How can I expand the range of my wireless control projects beyond 10 meters?
You can go beyond Bluetooth’s range by using an ESP32 or NodeMCU. These devices can connect to Wi-Fi, letting you control your projects from anywhere. It’s a great way to make your smart home devices more powerful.
Are there specific safety protocols I should follow for electronic diy projects?
Safety is crucial. Always use a voltage divider when connecting your microcontroller to a Bluetooth module. This prevents damage. When working with AC power, make sure everything is insulated and never modify circuits while plugged in.