Smart Door Sensor DIY: The Ultimate Guide to Building Your Own Home Security System
We’ve all had that nagging feeling. You’re halfway to work, or perhaps already in bed, when a sudden thought strikes: Did I actually close the front door? In the past, solving this anxiety required a trip back home or an expensive, professionally installed security contract.
Today, that has changed. A smart door sensor diy project is one of the most effective, low-cost ways to step into the world of home automation. It’s a simple “gatekeeper” for your home that doesn’t just offer peace of mind it acts as the trigger for your entire smart ecosystem. Whether you want a notification on your phone when the kids get home or you want the hallway lights to turn on automatically when you walk in with groceries, it all starts with a sensor.
In this guide, we’ll break down everything you need to know about building and installing your own system without breaking the bank.
Why a Smart Door Sensor DIY Project is a Game Changer
If you’ve looked at professional security systems, you know they often come with monthly “monitoring” fees that never end. A DIY approach flips the script.
1. Enhanced Security for Pennies
By using a smart door sensor diy method, you can secure every entry point in your house for the price of a single pizza. These sensors alert you instantly if a door or window is opened when it shouldn’t be, giving you a real-time “burglar alarm” on your smartphone.
2. The Foundation of Automation
A door sensor isn’t just for security; it’s a trigger. You can program your home so that:
- If the door opens after 6:00 PM, then turn on the entryway lights.
- If the balcony door stays open for 5 minutes, then turn off the air conditioner to save energy.
3. Easy, Non-Invasive Installation
Most DIY sensors use simple adhesive backing. This makes them perfect for renters or students (like those of us at ENSA Fès) who can’t drill holes into the walls but still want a high-tech living space.
The Components You’ll Need
There are two ways to approach this: the “Plug-and-Play” DIY and the “Maker” DIY.
The Sensor Hardware
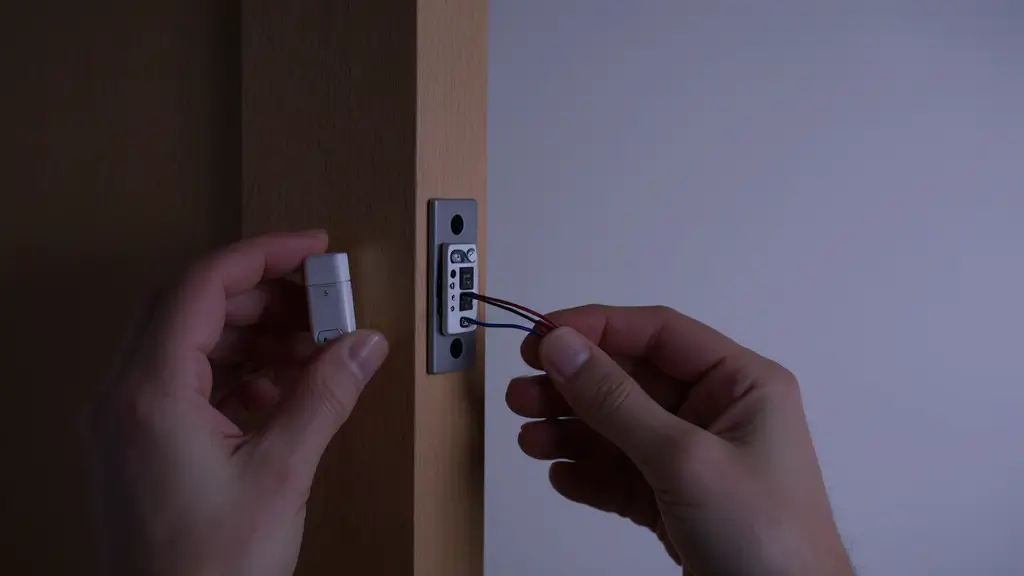
- Magnetic Contact Switch: This is the heart of the system. It consists of two parts: a reed switch and a magnet. When they are close, the circuit is closed. When they move apart, the circuit opens.
- The Brain (Connectivity): * Option A (Beginner): A Zigbee or Wi-Fi smart sensor (like those from Sonoff or Shelly).
- Option B (The Maker Path): An ESP8266 or ESP32 microcontroller. This allows you to write your own code and integrate it into a custom dashboard like Home Assistant.
Tools for Setup
- Smartphone with a home automation app (e.g., eWeLink, Tuya, or Home Assistant).
- Double-sided mounting tape (usually 3M).
- A small screwdriver (if using a wired magnetic switch).
Step by Step Build & Installation Guide
Let’s walk through the most common DIY setup: using a Wi-Fi-enabled magnetic sensor.
Step 1: Pair the Device
Before mounting anything to the door, you need to introduce the sensor to your network.
- Open your chosen app and select Add Device.
- Put your sensor into pairing mode (usually by holding a small button until an LED blinks).
- Connect it to your 2.4GHz Wi-Fi. Pro Tip: Smart sensors rarely work on 5GHz networks, so make sure your phone is on the 2.4GHz band during setup.
Step 2: Test the Logic
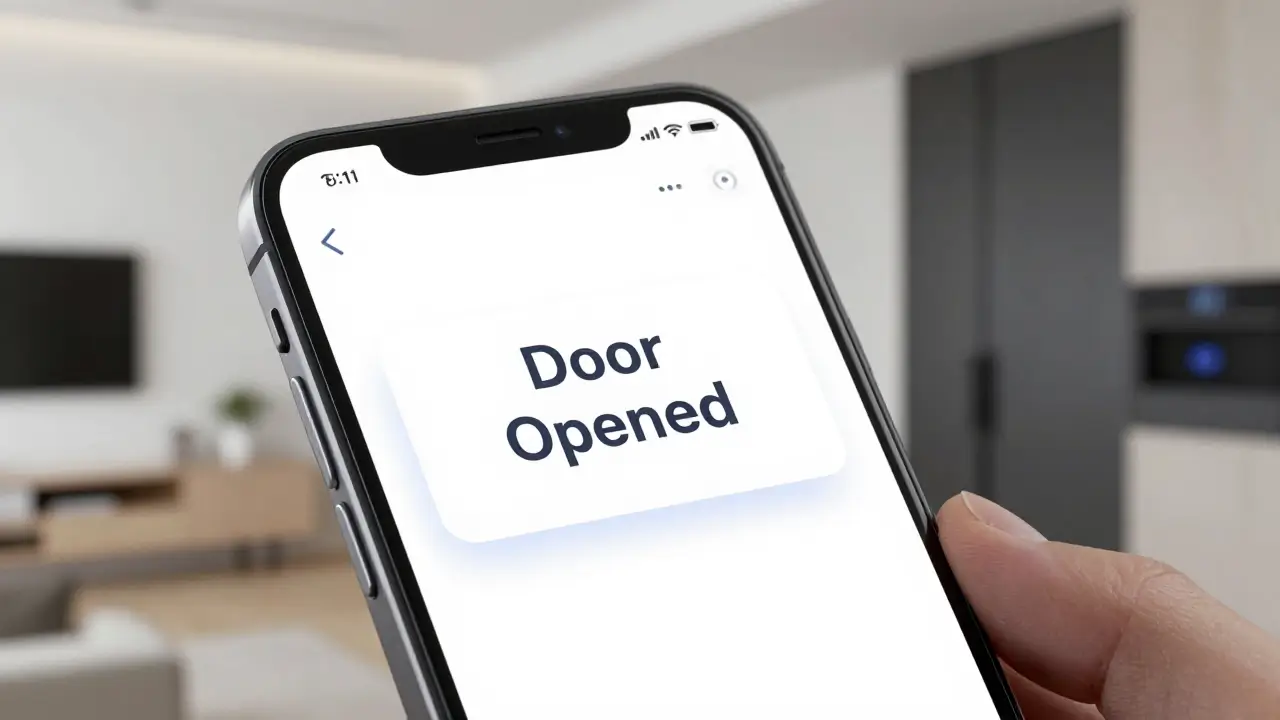
Hold the two pieces of the sensor together in your hand. The app should show “Closed.” Separate them by an inch. The app should instantly update to “Open.” If this works, you’re ready to mount.
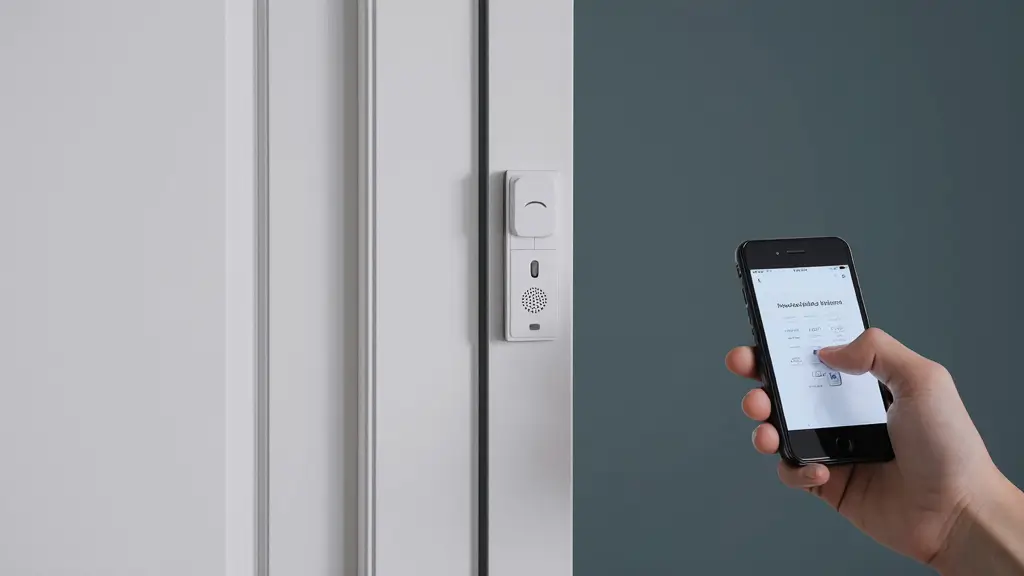
Step 3: Proper Placement
The Main Unit (the one with the battery and electronics) should usually go on the door frame. The smaller Magnet goes on the moving part of the door.
- Alignment: Make sure the little notches or arrows on the sides of both pieces are facing each other.
- Gap: Ensure the gap between them is less than 10mm when the door is shut.
Step 4: Final Mounting
Clean the surface with a bit of alcohol to remove dust. Apply the adhesive tape and press firmly for 30 seconds.
How It Works: Behind the Scenes
The beauty of a smart door sensor diy setup is its simplicity.
- Detection: The reed switch inside the main unit stays Closed thanks to the magnetic field of the smaller piece.
- Trigger: As soon as the door opens, the magnetic field disappears. The reed switch physically snaps open.
- Communication: The sensor wakes up from Sleep Mode, connects to your Wi-Fi (or Zigbee hub), and sends a tiny packet of data to the cloud.
- Notification: The cloud server pushes a notification to your phone. This entire process usually happens in less than 2 seconds.
Common Mistakes to Avoid
- Metal Interference: If you have a heavy iron or steel door, the metal can interfere with the magnet. You may need to use a small plastic “spacer” to lift the sensor off the metal surface.
- Wrong Alignment: If the magnet is too high or too low compared to the main unit, it might trigger “False Alarms” where the sensor thinks the door is open even when it’s closed.
- Ignoring the Battery: Most DIY sensors use CR2032 or AAA batteries. If your sensor starts dropping offline, the battery is likely low.
Pro Tips for the DIY Specialist
- Battery Optimization: In your app settings, turn off “Status Heartbeats” if you don’t need them. This prevents the sensor from waking up every hour just to say “I’m still here,” extending battery life significantly.
- Improve Accuracy with Debouncing: If you are using an ESP8266 to build a custom sensor, make sure your code includes a debounce filter. This prevents a door that rattles in the wind from sending 50 notifications in a row.
- Naming Convention: Don’t just call it Sensor 1. Use names like Balcony Window or Main Entrance. This makes voice commands (like Alexa, is the front door closed?) much more natural.
Use Cases for Your DIY Sensors
Once you master the smart door sensor diy on your front door, you can apply it everywhere:
- Window Monitoring: Use them on ground-floor windows for extra security at night.
- The Mailbox Hack: Put a sensor inside your mailbox. You’ll get a notification the moment the mail is delivered.
- Liquor or Tool Cabinet: If you have areas you want to keep off-limits to kids, a sensor acts as a silent watchman.
FAQs:
Is a smart door sensor diy project hard for beginners?
Not at all. If you can use a smartphone and peel a sticker, you can install a smart door sensor. If you choose the ESP8266 “Maker” route, it requires a bit of wiring and code, but it is a perfect “first project” for engineering students.
Does it need internet to work?
For phone notifications while you are away from home, yes. However, if you use a local hub like Home Assistant, your door sensor can trigger your lights even if the internet goes down.
Building a smart door sensor diy system is the single most rewarding entry point into home security. It’s affordable, highly effective, and gives you a level of control that expensive pro systems just can’t match.
By following the steps above, you’ve moved from being a passive consumer of tech to a creator of your own secure environment. So, grab a sensor, fire up your app, and start automating. Your home of the future is officially open for business.